
Web dashboard
Set up the read-only web dashboard for your sales, with a reverse proxy, inside Pterodactyl, or on a plain panel.
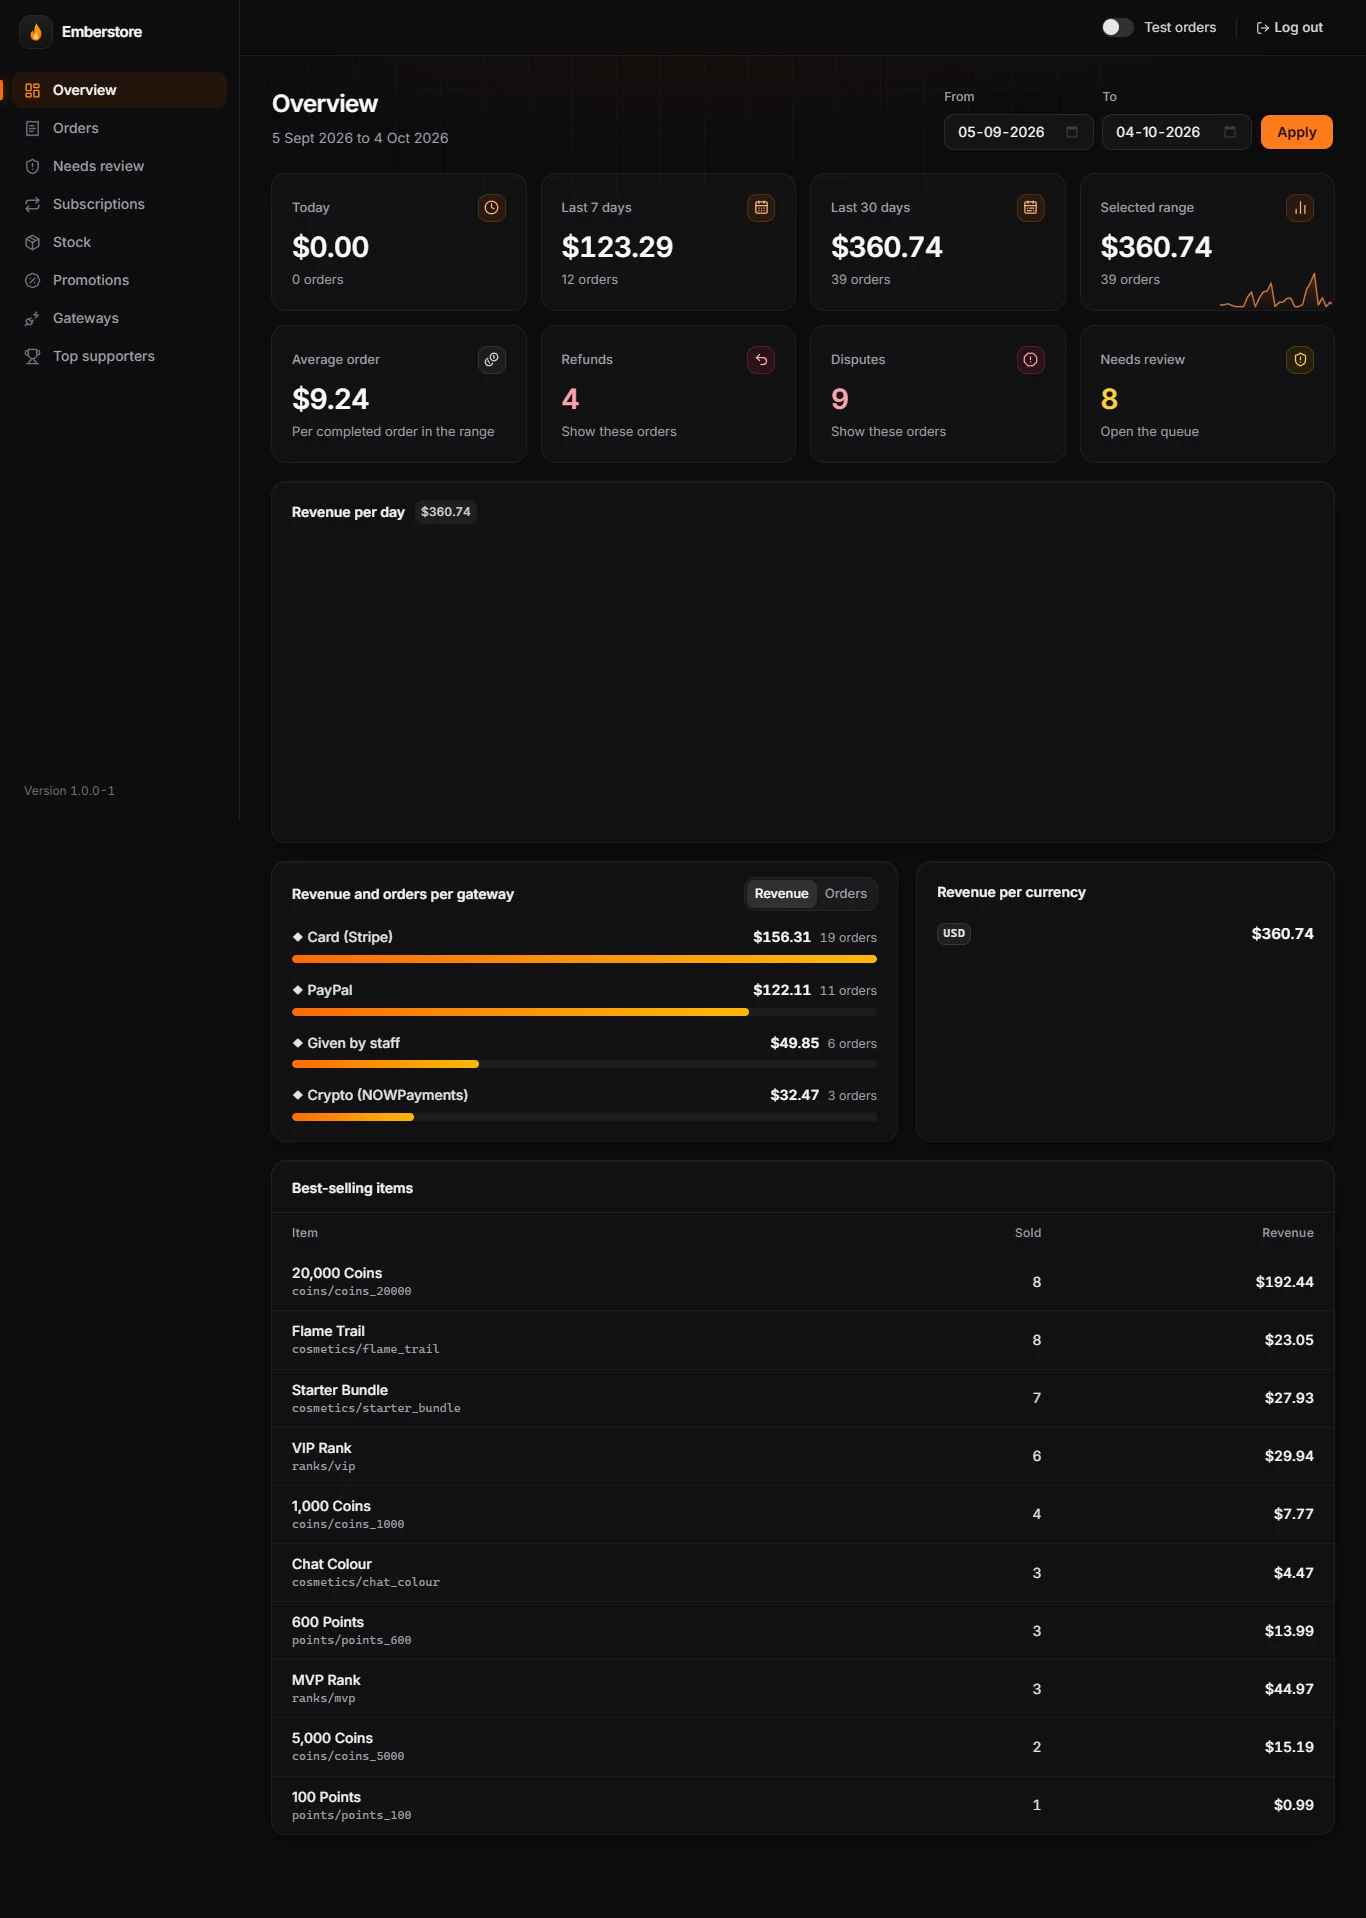
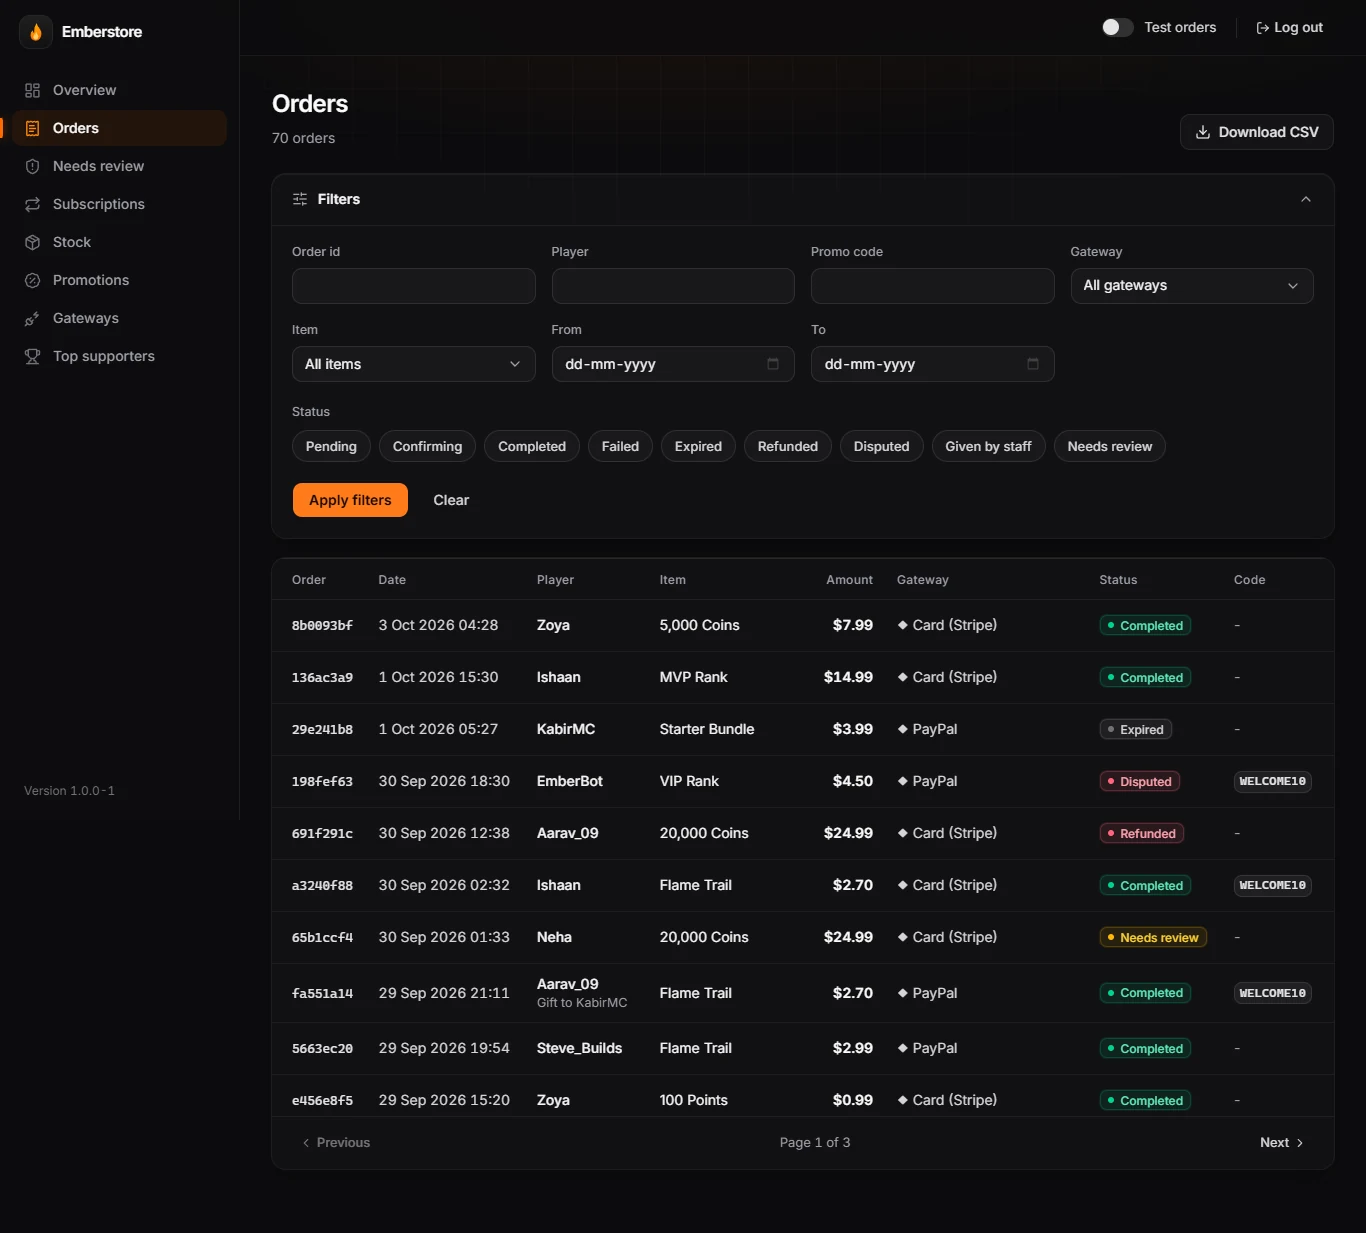
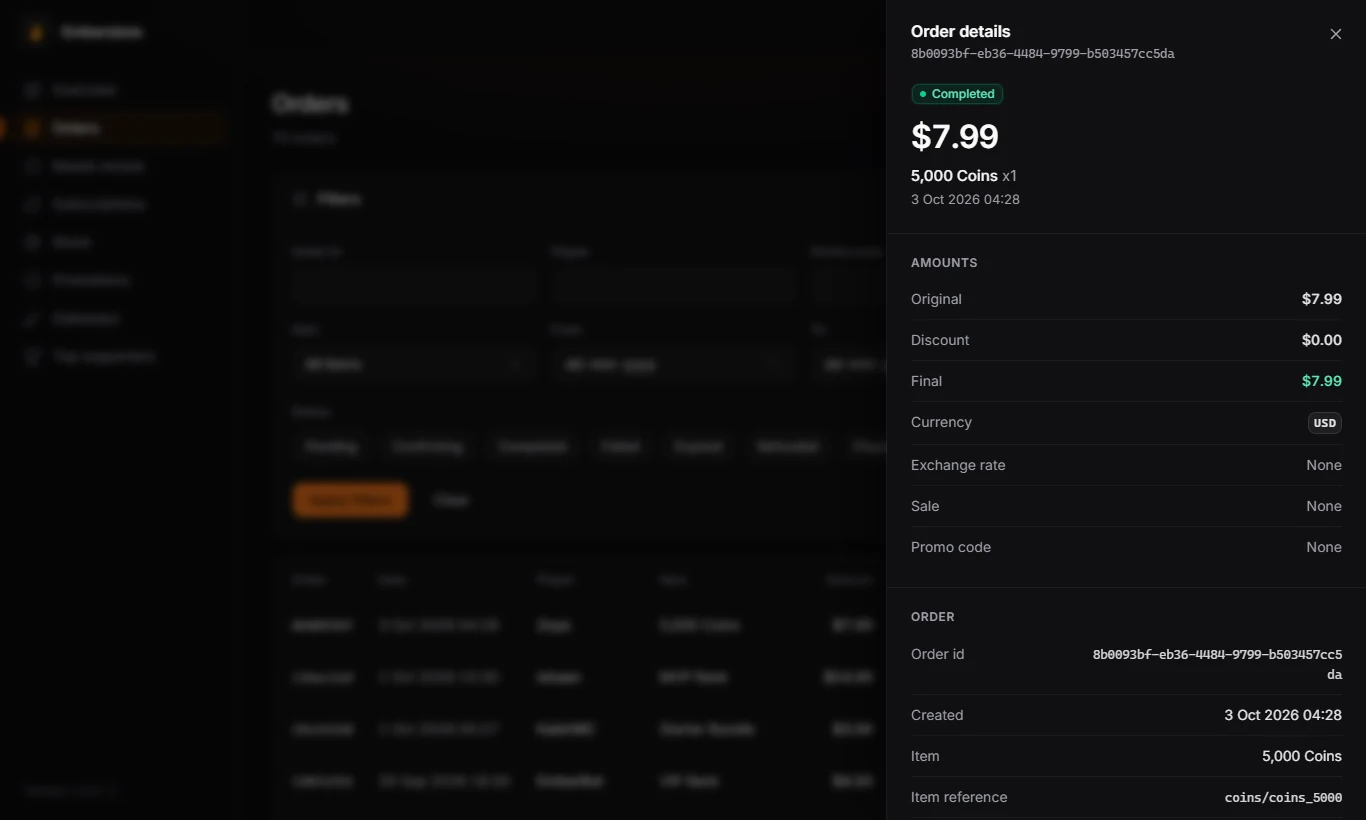
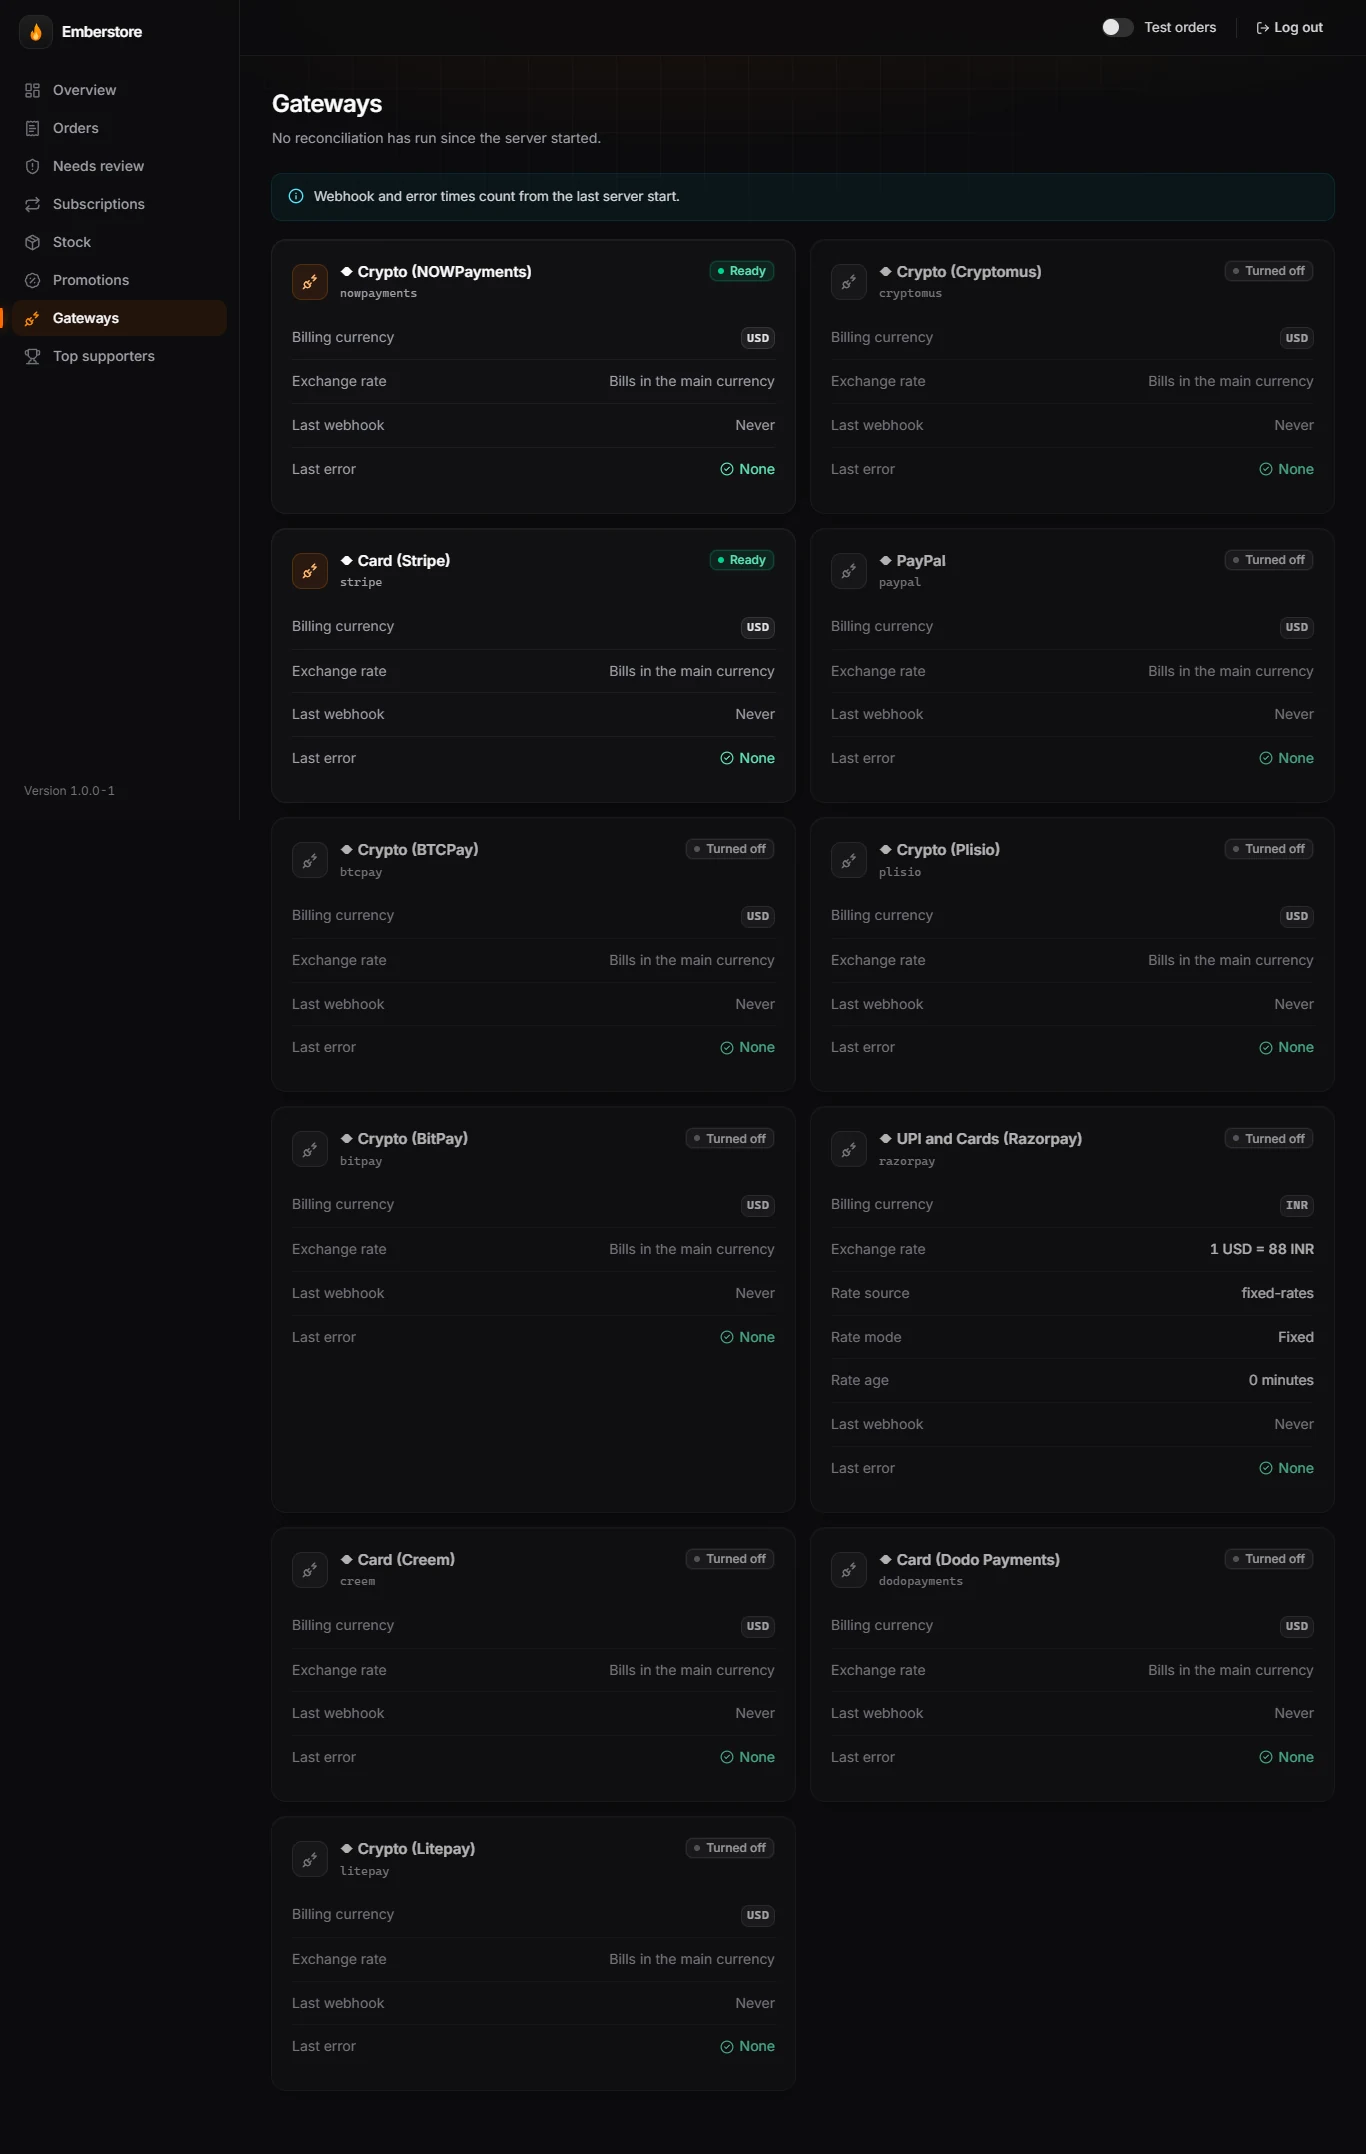
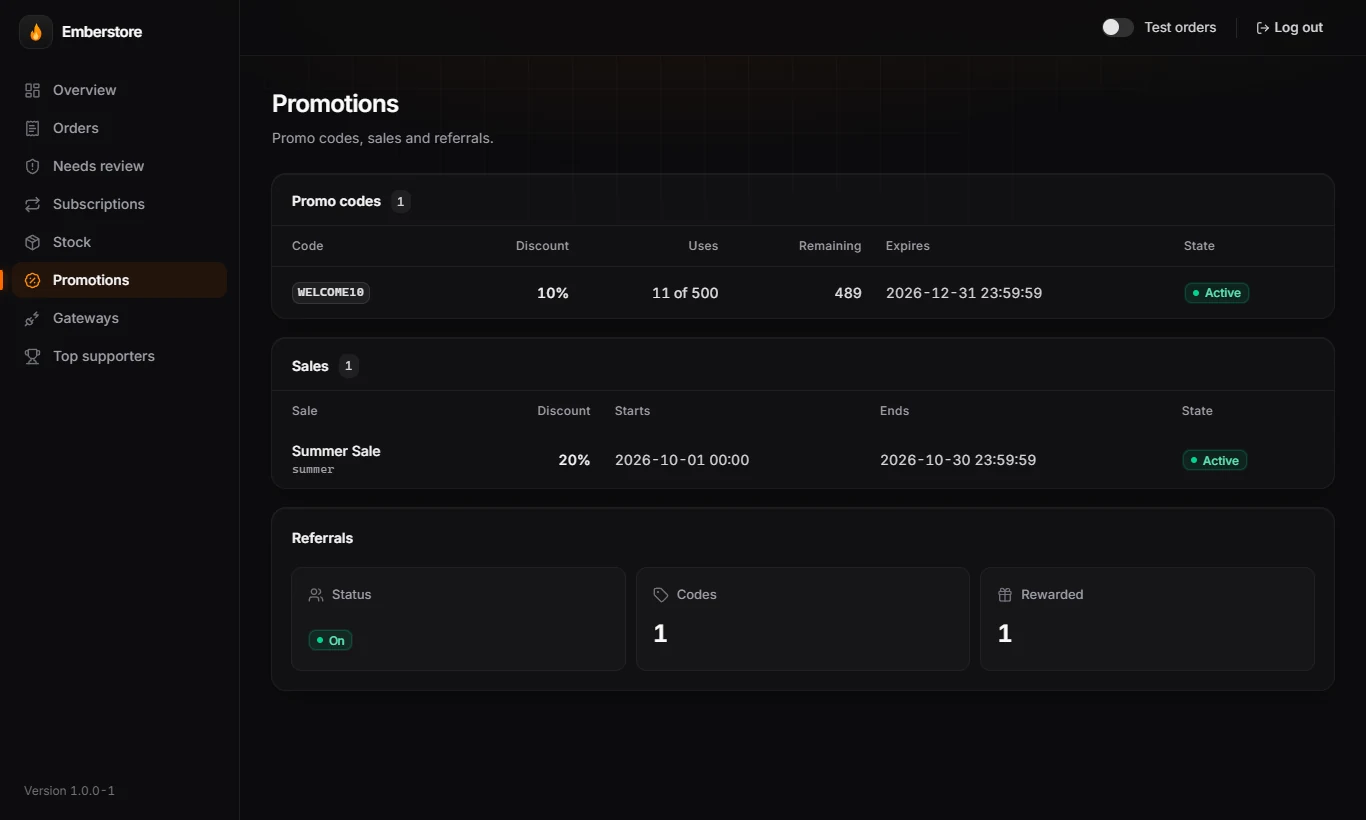
The Emberstore web dashboard lets you see your sales in a browser: revenue, orders, subscriptions, stock, promo codes, gateway health and your top supporters. It is read-only. Nobody can refund, grant or change anything from it, so the worst a stolen login can do is let someone look at your sales.
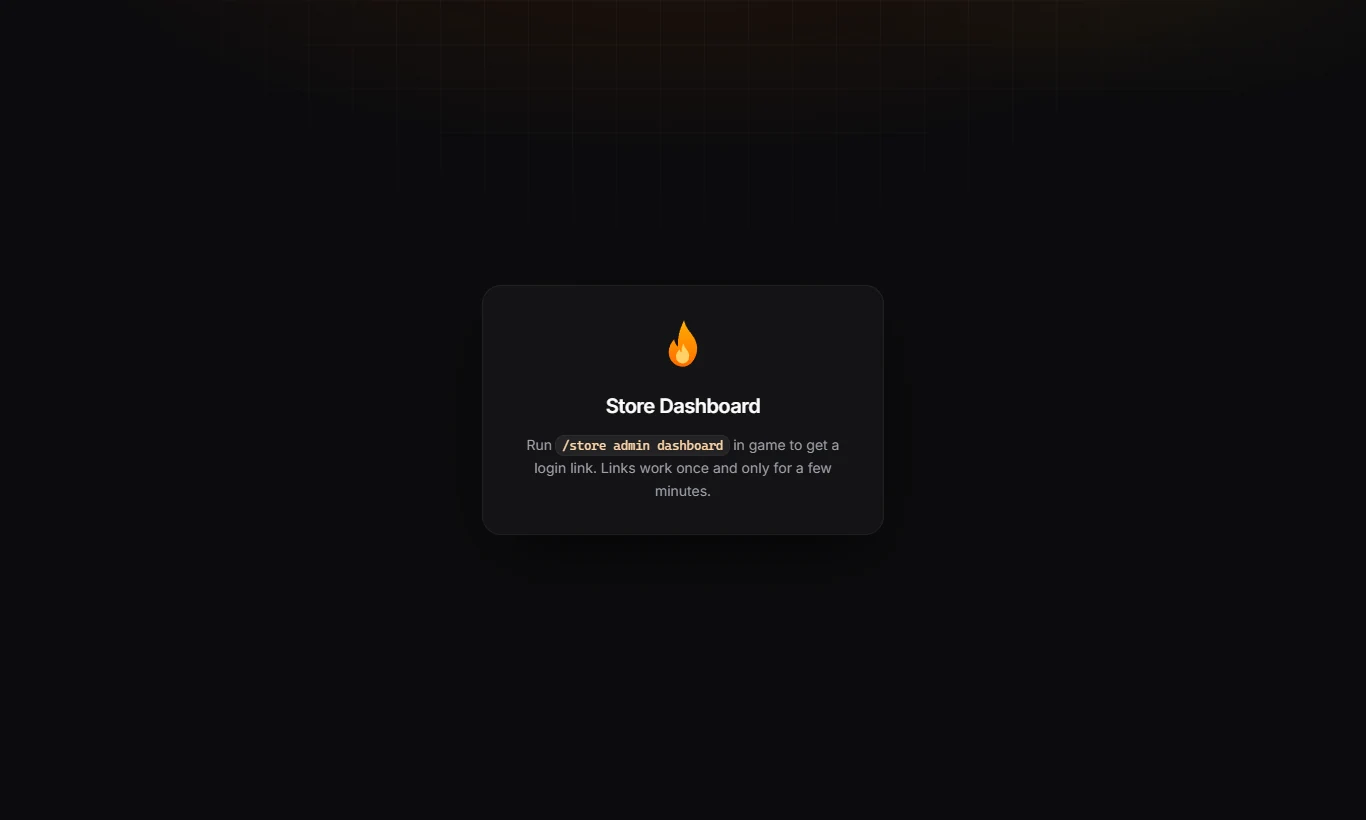
There are no usernames or passwords. You type /store admin dashboard in game, Emberstore gives you a one-time login link, and that link opens the dashboard. The link works once and stops working after 5 minutes.
The dashboard is off until you switch it on. How you set it up depends on what you have, so start by finding your scenario.
What it looks like

Which scenario are you?
| What you have | Go to |
|---|---|
| A VPS you log into with SSH, and no hosting panel | Scenario 1 |
| A VPS you log into with SSH, and your Minecraft server runs in a Pterodactyl panel on it | Scenario 2 |
| Only a Pterodactyl panel from a hosting company, with no SSH | Scenario 3 |
Scenarios 1 and 2 give you a proper https:// address. Scenario 3 gives you a plain http:// address unless your host can offer HTTPS, and it explains how to stay safe with that.
Before you start
You will need these in every scenario.
- A recent Emberstore with the dashboard included.
- Two free ports for the plugin to listen on. The defaults are 8443 for payment webhooks and 8444 for the dashboard.
- For scenarios 1 and 2, a domain name you control, such as
store.example.com. A cheap domain is fine.
After you change any setting below, restart the server once. Then run /store admin dashboard in game. If the dashboard is off or a setting is wrong, Emberstore tells you why in chat and in the console.
Note The dashboard and the payment webhooks are two different listeners. Payment gateways talk to the webhook listener, you talk to the dashboard. Both need to be reachable from outside, and most payment gateways want the webhook address to be HTTPS. That is one more reason to prefer scenario 1 or 2.
Scenario 1: VPS with SSH only
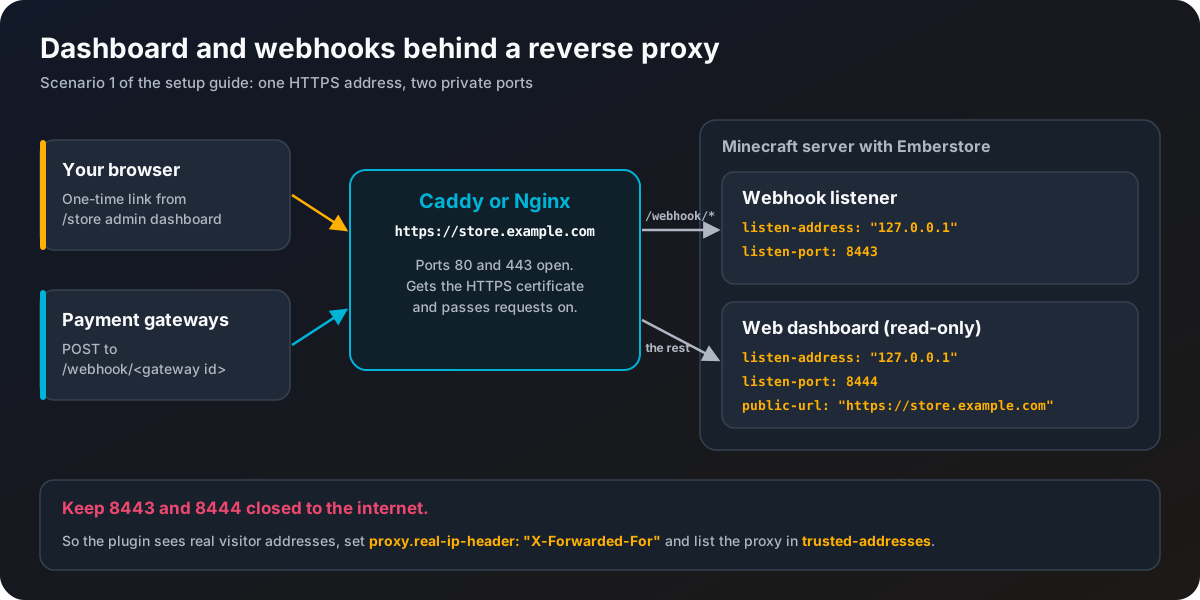
You rent a VPS, log in over SSH, and run Minecraft and Emberstore directly on it. This is the cleanest setup. A small web server called Caddy sits in front of Emberstore, gets a free HTTPS certificate for you automatically, and passes requests through.
1. Point a domain at your VPS
In your domain's DNS settings, add an A record. Name it store (so the address becomes store.example.com) and point it at your VPS's public IP address. DNS can take a few minutes to update.
2. Install Caddy
Follow the official install steps for your system at https://caddyserver.com/docs/install. When it is installed, Caddy runs as a service and reads its settings from /etc/caddy/Caddyfile.
3. Tell Caddy where Emberstore is
Open /etc/caddy/Caddyfile, replace everything in it with the text below, and change the domain to yours.
store.example.com {
    handle /webhook/* {
        reverse_proxy 127.0.0.1:8443
    }
    handle {
        reverse_proxy 127.0.0.1:8444
    }
}
This sends payment webhooks to port 8443 and everything else to the dashboard on port 8444. Then reload Caddy:
sudo systemctl reload caddyCaddy now fetches an HTTPS certificate for your domain by itself. This only works if the DNS record from step 1 is already live and ports 80 and 443 are open (step 4).
4. Close the plugin ports to the world
Only Caddy should be reachable from outside. If you use ufw, run these:
sudo ufw allow 80/tcp
sudo ufw allow 443/tcp
sudo ufw status
Do not open 8443 or 8444. They stay private on the VPS, and Caddy reaches them from the inside.
5. Set up Emberstore
In plugins/Emberstore/config.yml, set these values.
webhook:
  # Run the webhook listener on this server. On a multi-server network only one server should
  enabled: true
  # Address the webhook listener binds to
  listen-address: "127.0.0.1"
  # Port the built-in webhook listener binds to
  listen-port: 8443
  # Public HTTPS address of the listener. Each gateway posts to this address plus /webhook/<gateway>
  public-base-url: "https://store.example.com"

dashboard:
  # Turn the read-only web dashboard on or off
  enabled: true
  # Address the dashboard listens on
  listen-address: "127.0.0.1"
  # Port the dashboard listens on
  listen-port: 8444
  # Public HTTPS address admins open the dashboard at, used to build login links
  public-url: "https://store.example.com"

proxy:
  # Request header carrying the real client address when a reverse proxy sits in front
  real-ip-header: "X-Forwarded-For"
  # Addresses of proxies allowed to set that header
  trusted-addresses: ["127.0.0.1", "::1"]
Restart the server.
6. Log in
In game, run /store admin dashboard, click the link, and the dashboard opens. If you are on the console, the link is printed there instead.
Prefer Nginx to Caddy?
Install Nginx and Certbot, then create a site file such as /etc/nginx/sites-available/emberstore with this content, and link it into sites-enabled.
server {
    listen 80;
    server_name store.example.com;

    location /webhook/ {
        proxy_pass http://127.0.0.1:8443;
        proxy_set_header Host $host;
        proxy_set_header X-Forwarded-For $remote_addr;
        proxy_set_header X-Forwarded-Proto $scheme;
    }

    location / {
        proxy_pass http://127.0.0.1:8444;
        proxy_set_header Host $host;
        proxy_set_header X-Forwarded-For $remote_addr;
        proxy_set_header X-Forwarded-Proto $scheme;
    }
}
Reload Nginx, then run sudo certbot --nginx -d store.example.com to get the certificate. Steps 4 to 6 are the same as above.
Scenario 2: VPS with SSH and Pterodactyl
Your Minecraft server runs inside Pterodactyl, which runs every server in its own container. This changes one thing: a container has its own private "localhost". Emberstore listening on 127.0.0.1 inside the container cannot be reached by Caddy on the VPS. The fix is to give the server two extra ports on the VPS's public IP address, point Caddy at them, and block those two ports from everyone else. The steps below use 203.0.113.10 as the VPS's public IP, use your own.
1. Point a domain at your VPS
Same as scenario 1. Add an A record for store.example.com pointing at your VPS IP.
2. Create two ports in the panel
You need admin access to the panel for this.
- Open the Admin area, then Nodes, then your node, then the Allocation tab.
- In the form to add allocations, set the IP address to your VPS's public IP, for example
203.0.113.10, and the ports to8443, 8444. Save.
3. Give them to your Minecraft server
- In the Admin area, open your server, then Build Configuration.
- Under Additional Allocation(s), add
203.0.113.10:8443and203.0.113.10:8444. Save. - Restart the server from the panel.
4. Install and set up Caddy on the VPS
Do steps 2 and 3 of scenario 1 on the VPS itself, with one change in the Caddyfile: point both reverse_proxy lines at the public IP, 203.0.113.10:8443 and 203.0.113.10:8444, instead of 127.0.0.1.
5. Close 8443 and 8444 to the outside
Do step 4 of scenario 1. Then block the two plugin ports for everyone except the VPS itself. Docker publishes container ports past ufw, so a ufw deny is not enough here; the rule has to go in Docker's own DOCKER-USER chain:
sudo iptables -I DOCKER-USER -p tcp -m multiport --dports 8443,8444 ! -s 203.0.113.10 -j DROP
sudo apt install iptables-persistent
sudo netfilter-persistent save
The first line drops traffic to those ports unless it comes from the VPS's own address, which is where Caddy connects from. The last two keep the rule after a reboot. To check it, open http://203.0.113.10:8444 from your own computer: it should not load.
6. Find your Docker network address
Requests from Caddy reach the container through Docker, so the plugin sees them coming from a Docker address, not from the VPS itself. Tell Emberstore to trust that address, otherwise every visitor looks like the same person and the login rate limit would lock everyone out together. On the VPS, run:
docker network ls
docker network inspect pterodactyl_nw
Pterodactyl usually names its network pterodactyl_nw. Look for the Subnet line in the output. It is most often 172.18.0.0/16.
7. Set up Emberstore
In plugins/Emberstore/config.yml:
webhook:
  # Run the webhook listener on this server. On a multi-server network only one server should
  enabled: true
  # Address the webhook listener binds to
  listen-address: "0.0.0.0"
  # Port the built-in webhook listener binds to
  listen-port: 8443
  # Public HTTPS address of the listener. Each gateway posts to this address plus /webhook/<gateway>
  public-base-url: "https://store.example.com"

dashboard:
  # Turn the read-only web dashboard on or off
  enabled: true
  # Address the dashboard listens on
  listen-address: "0.0.0.0"
  # Port the dashboard listens on
  listen-port: 8444
  # Public HTTPS address admins open the dashboard at, used to build login links
  public-url: "https://store.example.com"

proxy:
  # Request header carrying the real client address when a reverse proxy sits in front
  real-ip-header: "X-Forwarded-For"
  # Addresses of proxies allowed to set that header
  trusted-addresses: ["127.0.0.1", "::1", "172.18.0.0/16"]
Use the subnet you found in step 6 in place of 172.18.0.0/16 if it differs. The address 0.0.0.0 looks open, but it only means "listen on every address inside the container". The rule from step 5 is what keeps the two ports private, so do not skip it.
Restart the server.
8. Log in
Run /store admin dashboard in game and click the link.
Scenario 3: Only a Pterodactyl panel
Your host gives you a Pterodactyl panel and nothing else, so you cannot install Caddy or anything on the machine. The dashboard is then served straight from your server's own address, like http://203.0.113.10:25600.
Important A plain
http://address is not encrypted. Anyone who can watch your network traffic, for example on public Wi-Fi, could copy your login link or your session. Emberstore keeps the damage small, since the link works once and the dashboard is read-only, but you should still follow the safety habits at the end of this section, and ask your host about HTTPS (step 5).
1. Get one spare port
The dashboard needs a port of its own. In the panel, open your server's Network tab. If you already have an extra port there, note it. If not, add one if your plan allows it, or ask your host's support to add another port to your server.
2. Set up Emberstore
Replace 25600 with your spare port and use your server's real IP address in public-url. You can see the IP on the same Network tab.
dashboard:
  # Turn the read-only web dashboard on or off
  enabled: true
  # Address the dashboard listens on
  listen-address: "0.0.0.0"
  # Port the dashboard listens on
  listen-port: 25600
  # Public address admins open the dashboard at, used to build login links
  public-url: "http://203.0.113.10:25600"
  # Allow a plain http public-url. Only use this when you cannot get HTTPS
  allow-insecure-http: true
The setting allow-insecure-http is a deliberate "I understand" switch. Without it, Emberstore refuses to start the dashboard on a plain http:// address. You will also see a warning in the console that traffic is unencrypted. That warning is expected here.
3. Restart and log in
Restart the server from the panel, run /store admin dashboard in game, and click the link.
4. Keep it safe
- Log in only from a network you trust, such as home Wi-Fi or your own mobile data. Avoid public Wi-Fi.
- When you finish, run
/store admin dashboard revoke. It ends every session and cancels unused links. - Never share a login link. It is a key to your sales figures.
5. Ask your host for HTTPS
Some hosts can put HTTPS in front of a server port. Look at your host's knowledge base or ask support whether they offer a free subdomain with SSL that forwards to one of your server's ports. If they do, point it at your dashboard port, then change your config to the new address and turn the insecure switch off.
dashboard:
  # Public HTTPS address admins open the dashboard at, used to build login links
  public-url: "https://store.example.com"
  # Allow a plain http public-url. Only use this when you cannot get HTTPS
  allow-insecure-http: false
A word about payments
The dashboard is not the only thing that needs to be reachable. Your payment gateways must be able to call the webhook listener, and many gateways insist that this address is HTTPS. If your host cannot give you HTTPS, check each gateway's own documentation for what it accepts before you rely on it. If your host cannot give you what you need, moving to a small VPS and following scenario 1 is the dependable fix.
Troubleshooting
| What you see | What to check |
|---|---|
| The page does not load at all | The ports in the config match the ports you opened or allocated. The server was restarted after the change. In scenarios 1 and 2, Caddy is running (sudo systemctl status caddy) and DNS points at the VPS. |
| The browser warns the connection is not secure | You are on http://. In scenarios 1 and 2 this means HTTPS is not set up yet. Check that ports 80 and 443 are open and that the domain is correct in the Caddyfile. |
| "Login link is not valid" | The link was already used or is older than 5 minutes. Run /store admin dashboard again. |
| You are logged out right away | public-url starts with https:// but you opened the page over http://, or the other way round. Use exactly the address in public-url. |
| "Too many attempts" | Wait 10 minutes. If this happens to you after only one try, your proxy.trusted-addresses is missing the proxy's address, so every visitor looks the same (see step 6 of scenario 2). |
| Emberstore says the dashboard is off | dashboard.enabled is false, or it refused to start. Read the console message above the error, it names the setting. |
| Console warns that traffic is unencrypted | Expected in scenario 3. In scenarios 1 and 2 it means listen-address is not what you intended. |
Safety checklist
- Keep 8443 and 8444 closed to the internet whenever you have a reverse proxy (scenarios 1 and 2).
- Prefer HTTPS. Use the plain
http://option only when there is no alternative. - Run
/store admin dashboard revokeif you ever shared a link or logged in on a device you do not trust. - On a network of several servers, run the dashboard on one server only, the one that also receives payment webhooks.